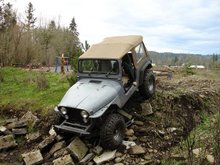
Before.....
 Before.... driveline not in place, but it did hang about this low.....
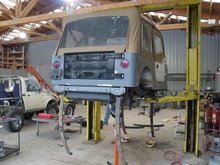
 After the case was re-drilled and studs in place....
 New measurement. ....
 New clearance and a driveline that isn't hanging as low....
 Before.... driveline not in place, but it did hang about this low.....After the case was re-drilled and studs in place....New measurement. ....New clearance and a driveline that isn't hanging as low....


 Here is a picture of the stainless heat shield that I added to the muffler. After all, it is almost touching the floor.
 Here you can see 2/3 of the exhaust after being fully welded. It looks really clean. I was able to add a flange on each side of the mufler to make it easily replaceable without having to redo the whole system.
 I ended up using the stock collectors mostly because I had them, but I could've easily bought some at the muffler shop.
 The tailpipe with a sweet turndown.
 I routed the diver side pipe in front of the oil pan up out of the way. The passenger pipe joins in on the other side and increases to 2.5" pipe. You can see that the J bends make it very easy to route your pipes wherever you want and they make for a clean finished look. I may add some heat wrap or shielding around the oil pan if it ends up being a problem, but there is still a good ammount of space between the pipes and the pan. It will probably be fine as the factory exhaust was just as close (other than being below the pan instead of in front of it).
 I cut out the portions for the gauge panel and steering wheel and then could take off the plastic. Turned out pretty good over all.
 I made the panel out of alluminum because it was easier to cut the holes for the gauges. I was able to use a file to make everything fit nice.
 Here is a picture of the panel in place minus the CB, the water temp guage and some switches.
 Here you can see how the stainless fits up under the dash pad. I still need to make a cover for the fuse and relay area on the passenger side. It will hinge down similar to a glove box.
 I got the other guage just today and was able to put it into the panel to see a finished look. Still need to wire it up and put in the CB. I really like the dark gray on stainless look.

 This mount is where the point of the jack slides in. I still need to make some sort of latch system to keep this end of the jack from lifting out of its pocket. I may just add some tie downs and a piece of webbing.
 Handy little tire iron holder. When the tire is on it pushes up against the iron.
 With the jack mounted
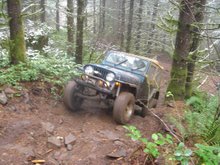
 Finally, a full sized spare (36x12.50 for me). This tire was free thanks to my good buddy Allan. He actually got me two and Mike two. They were a set, but had some bad cupping so we split them up and made them spares. And no nothing is broken on my rear axle.